
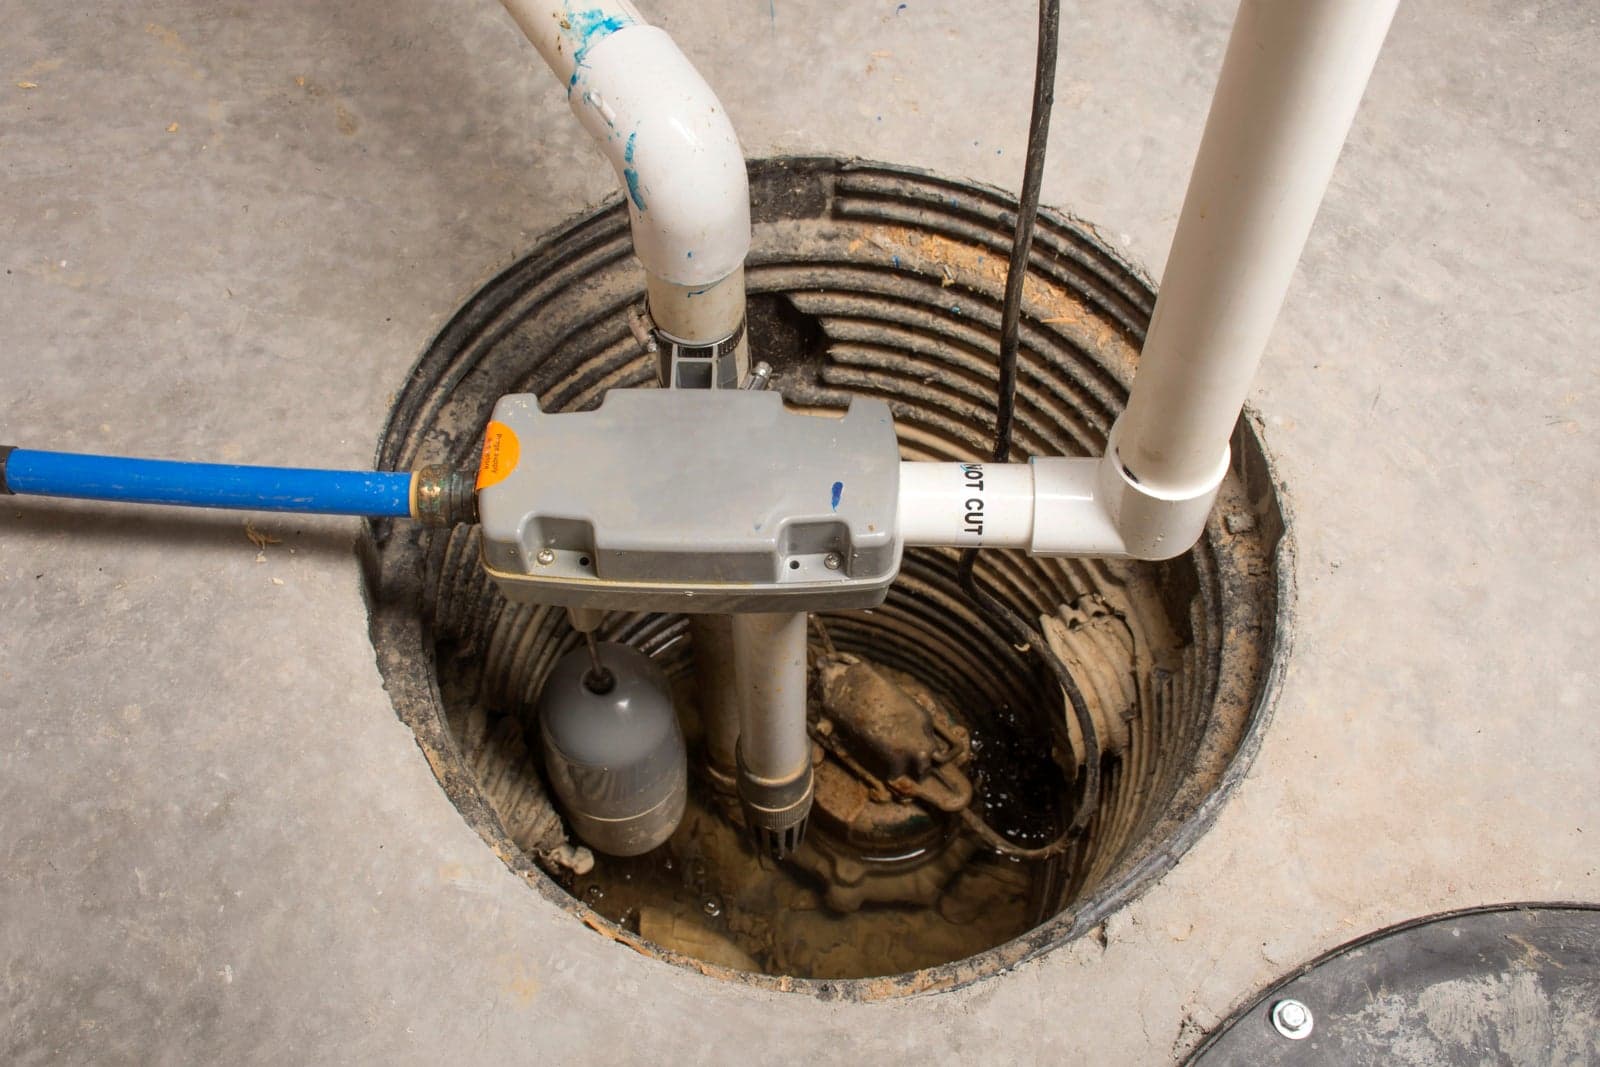
Cleaning a sump pump takes about an hour: disconnect power, lift the pump from the basin, clean the pump body and intake grate, drain and scrub the basin, reassemble, and test with a bucket of water. Do the full cleaning annually, run a quick bucket test quarterly, and always service the system before storm season. A pump that rattles, short-cycles, or fails the test needs professional attention.
On this page:
The 9 Cleaning Steps
Your Maintenance Schedule
The Bucket Test
Check the Discharge Line Too
Why Maintenance Pays Off
When Cleaning Isn't Enough
FAQs
Your sump pump sits in a pit collecting silt, gravel, and everything groundwater carries into it. Then one stormy night, you need it to run flawlessly for hours.
Those two facts are on a collision course in most basements. An hour of cleaning once a year keeps them from colliding in yours.
Ways to Clean a Sump Pump System & Pit
1. Unplug & Disconnect Your Sump Pump
Power off first, every time. Unplug the pump itself and, if you have a battery backup, disconnect that too, because a backup exists specifically to run when the primary loses power.
One safety rule worth stating plainly: never work in a pit with standing water while any cord is still connected. Water and live electricity share no workspace.
2. Remove the Pump From the Basin
Disconnect the pump from the discharge pipe (most connect with a check valve union or hose clamp) and lift it out. Set it on a tarp or old towels, because what's coming off of it belongs outside, not on your basement floor.
3. Clean the Pump
Scrape off sludge with a plastic scraper, then rinse the housing with a garden hose outside. For mineral scale and crusted deposits on the impeller area, a soak in white vinegar loosens what the hose can't.
Work gently around the float switch. It's the pump's on/off brain, and a bent float arm creates the exact failure you're trying to prevent.
4. Drain the Sump Basin
Remove standing water from the pit with a wet/dry vacuum. You want to see the bottom, because that's where the problems collect.
5. Clean the Grate
The intake grate (or screen) at the pump's base is the single most important thing you'll clean today. Gravel and debris that slip through it jam the impeller, and a jammed impeller is the most common failure we pull out of Jacksonville sump pits. Clear every opening.
6. Clean the Basin
Scoop out the silt, gravel, and debris that have settled into the pit, then wipe down the walls. Everything you remove now is something the pump won't swallow during the next tropical downpour.
7. Place the Sump Pump Back
Set the pump back on a flat, stable base, centered so the float switch can travel its full range without touching the pit wall. A float that hangs up on the wall is a pump that never turns on.
8. Connect the Discharge Line
Reconnect the discharge fitting snugly and confirm the check valve is oriented correctly (the flow arrow points away from the pump). The check valve keeps pumped water from pouring back into the pit after each cycle.
9. Test the Sump Pump
Plug everything back in and run the bucket test described below. Cleaning without testing is a job half done.
Your Sump Pump Maintenance Schedule
Cleaning is one event; maintenance is a rhythm. Here's the cadence that keeps basements dry:
When | What to do |
Quarterly | Bucket test + visual check of the pit and float |
Annually (May, before storm season) | The full 9-step cleaning + discharge line walk-through |
Every 3–5 years | Replace the backup battery, if you have one |
Around year 10 | Professional evaluation for replacement planning |
The May timing matters in Northeast Florida. Atlantic hurricane season loads the pit from June onward, and the week you discover a dead pump shouldn't be the week the named storm arrives.
The Bucket Test (Do This One Quarterly)
Pour about five gallons of water into the pit and watch what happens. The float should rise smoothly, the pump should kick on promptly, the water should leave through the discharge line, and the pump should shut off without rapid on-off cycling.
That single test exercises the float, the motor, the check valve, and the discharge path at once. Fifteen minutes, four components verified, no tools.
Don't Skip the Discharge Line and Check Valve
Most cleaning guides stop at the pit. The water still has to go somewhere.
Walk the discharge line outside and confirm the outlet is clear of mulch, leaves, soil washout, and landscaping projects. A blocked outlet bottles up the whole system no matter how clean the pump is.
Then listen during your bucket test: a pump that turns on and off in rapid bursts is usually re-pumping the same water past a failed check valve. Check valves are inexpensive parts with expensive consequences when ignored.
3 Benefits of Performing Sump Pump Maintenance
1. Flood Prevention
The obvious one, and the whole point. Most storm-night pump failures trace back to debris, jammed floats, and blocked lines, and every one of those is preventable with the routine above. For what's at stake, FEMA's flood preparedness guidance is a sobering read: even an inch of water in a home does real damage.
2. Lower Lifetime Cost
A maintained pump lasts years longer and avoids the compound bill of a failure: the replacement pump, plus the flooring, drywall, and belongings the failure took with it. What drives that bill is entirely about what the water reaches, which is why prevention is the cheap option.
3. Protected Home Structure
Repeated minor flooding degrades foundations, breeds mold, and quietly rots framing from the bottom up. A working sump pump is structural protection disguised as a plumbing accessory.
If you have a battery backup, fold it into the same session: test it by unplugging the primary during your bucket test, check the terminals, and replace batteries on the 3–5 year cycle rather than after the outage that proves they're dead.
When Cleaning Isn't Enough
Some symptoms mean the pump is past what a cleaning fixes: it's roughly 10 or more years old, it rattles or grinds during the bucket test, rust is visible on the impeller shaft, or it keeps short-cycling after you've cleaned the pit and checked the valve.
Those are evaluation calls, and the honest answer is sometimes a repair and sometimes a replacement planned on your schedule instead of a storm's.
Pump failed its bucket test, or making noises a cleaning didn't cure? A sump pump that can't pass a fifteen-minute test won't pass a tropical storm — that's a fix-it-now item in Florida. Fenwick + Waychoff's has served the greater Jacksonville area for nearly 60 years with same-day service, upfront pricing, and our "Always On-Time, Guaranteed" promise. Call 904-217-5694 and our sump pump repair and installation team will take it from here.
Reliable Sump Pump Repair & Installation Services
Whether your pump needs a rebuild, a backup system, or a straight answer about whether it has another storm season left, Fenwick + Waychoff's handles it with licensed plumbers, 24/7 emergency availability, and next-day installation.
Keep the pit clean, run the bucket test, and let us handle the rest. Call 904-217-5694 or book online with Fenwick + Waychoff's plumbing services today.
Frequently Asked Questions
How often should you clean a sump pump?
Do the full cleaning (pump, grate, and basin) once a year, ideally in late spring before storm season. Add a quarterly bucket test and a visual check of the pit. Homes with heavy groundwater, frequent pump cycling, or sandy soil benefit from cleaning twice a year.
Can I clean my sump pump without removing it?
Partially. With power disconnected, you can vacuum the pit, clear visible debris from the intake area, and flush the basin. But the intake grate and impeller, where the clogs that actually kill pumps form, are only reachable with the pump lifted out. Do the full removal at least annually.
What is the bucket test for a sump pump?
Pour roughly five gallons of water into the pit and watch the cycle: the float rises, the pump starts promptly, water exits through the discharge line, and the pump shuts off cleanly. It verifies the float, motor, check valve, and discharge path in one fifteen-minute quarterly check.
What can I use to clean sump pump sludge and scale?
A plastic scraper and a garden hose handle sludge, and a white vinegar soak dissolves mineral scale around the impeller. Avoid harsh solvents, which can degrade seals and gaskets. A wet/dry vacuum clears the basin itself faster than anything else.
How long do sump pumps last?
About 10 years for a typical residential pump, with maintenance being the biggest variable. Pumps that cycle constantly in wet-soil homes wear out sooner; well-maintained pumps in drier basements can go longer. Past the 10-year mark, plan replacement proactively rather than waiting for a failure.
When should I call a plumber instead of cleaning?
Call when the pump fails or struggles through a bucket test after cleaning, rattles or grinds while running, short-cycles constantly, shows rust on the shaft, or trips its breaker. Those symptoms point to motor, bearing, or switch problems that cleaning can't reach.
Related Articles
What do you need help with today?
Heating
No heat, strange smells, rising bills? We repair and replace heating systems to keep your home reliably warm.
Air Conditioning
AC blowing warm air? Uneven cooling in your rooms? We fix cooling issues fast and keep your system running smoothly all summer.
Plumbing
Our highly trained plumbers handle it all, from leaky faucets to full system installations and repipes.
Electrical
The smartest team in town. You need repair, installations, wiring, inspections, lighting — you name it.